 |
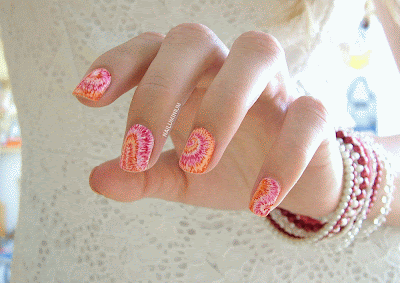
| High on Pink Tie Dye |
 |
| Irradiated Tie Dye |
In both designs (pink and green) I used a colour scheme of two colours and their shades, I also tried using more colours on friend's nails, but I didn't like that much.
The Process:
1. Paint your nails white. It doesn't matter what colour combo you choose, the base is always white.
2. Start with a sketch. Use the lightest colour you want in your design.
3. Add the second light(est) colour next to the first colour.
4. Add darker colours wherever it feels right. You can put it next to the two colours you have, between them or over them.
5. Keep doing n. 4.
6. Get contrast. Add more dark shades and next to (and over) them white and light shades. Seal your design with top coat.
I used acrylic paint and I don't think the result would be the same with nail polish, mostly because I get impatient working with polish. I use two brushes, striper and detailing, I bought several brushes in local craft store, they cost me 9 CZK each (about 0,30 €) and I cut them down to this size:
Additional Tips:
Usually I use the longer brush in steps 2 and 3 and the shorter in following steps.
You don't need perfectly smooth white base, you're covering it anyway.
In the green version, I added the glow in the dark top coat between steps 4 and 5 to keep the final contrast.
If you're thinking of buying acrylics but you're not entirely sure yet, stop that hesitating and get them.
Another possible result.
I guess that's it for today and for this tutorial. If you have any questions, I'll be happy to answer them.
If you recreate this sort-of-tie-dye, definitely let me know (even in the comments), I'd love to see it! :)


Love this! I should try this sometime!
ReplyDeletethank you!
DeleteOOoooh this looks so cool! I really love it :).
ReplyDeletewow, I'm happy to hear (read :D) that! :)
DeleteYay, thanks for doing this :D I'll hope to follow this tutorial at some point =)
ReplyDeleteI'm glad you like it, let me know if you try! :)
ReplyDeleteGirl you are so talented! Another one down on my to-do list :)
ReplyDeletethank you very much! I'm happy to inspire :)
ReplyDeleteThanks for sharingg
ReplyDelete